10 Simple Ideas That You Can Do To Reduce Waste Around Your House

“If you want to get serious about sustainability we have
to start with our waste.”


Waste is a serious problem that impacts all of us. Here’s 2 charts that shows how much the US wasted in the past years.  Could you imagine how much that has increased over the last few years.  How sad is this, when so many people in our world is starving to death?!?!

@http://www.theatlantic.com/business/archive/2012/06/26-trillion-pounds-of-garbage-where-does-the-worlds-trash-go/258234/

@http://www.huffingtonpost.com/dan-glickman/the-true-cost-of-food-was_b_6769352.html

Here’s 2 charts showing how much the world wastes

@http://www.huffingtonpost.com/dan-glickman/the-true-cost-of-food-was_b_6769352.html

The best place to start, is within our own home.  There is so many different things we can do, to reduce our own waste from recycling & repurposing items & materials, buying less things which means less clutter, & learning new ways to use up everything we have.  You can be as creative as you want, but if you need ideas there is so much out there.  It also doesn’t have to be some elaborate plan, oftentimes simple is better.  Aren’t sure where to begin, here’s
10 simple ideas that you can do to reduce waste around your house:
1. Use a gallon milk jug to water the roots of garden plants without standing there with a hose: Poke small holes in the bottom of the jug and bury it; fill with water for slow and steady irrigation.

2. Place old silica gel packets with personal papers and important documents to protect them from moisture and mildew.

3. Make a bird feeder out of a 2-liter plastic bottle.

4. Pour used bacon grease into a tuna or cat food can, chill until firm, and wire the can to a tree to give your feathered visitors some food. Bacon grease may be gross to some of us, but it attracts bluebirds, crows, jays, ravens, starlings, woodpeckers and Carolina wrens.

5. Missing game pieces instead of throwing away, use game board as a wall decor or coasters, & use the game pieces for jewelry, magnets, decor items

6. Compost everything that you don’t use ****put in a compost chart****

7. Coffee grounds- use in homemade soaps, exfoliate, use in garden to keep ants & slugs at bay, dried grounds used as a scouring agent, in fridge neutralizes odors,

8. Newspaper- lay down while painting, lie our snack cages with, wash windows with, use a layer in garden to help keep weeds at bay, compost,

9. Tea bags- for eyes, insect bites,

10. toilet paper tubes- for crafting, packaging & packing material, nesting materials etc

Additional readings:
Top 10 Ways To Reduce Waste
Waste Less Live More
The True Cost of Food Waste
2.6 Trillion Pounds of Garbage: Where Does The World’s Trash Go?
What are some ways you reduce wastes in 
your home? 


Sharing with:
Create With Joy, The Jenny Evolution,

Easy Apple-Pumpkin Cinnamon Rolls

Looking around the house this morning, I was trying to come up with a recipe that was easy to make, had everything on hand,  & had minimal prep & cook time.  When I found a can of pumpkin, an apple, & a package of crescent rolls I knew cinnamon rolls were in our near future.
20151005_200929
These are great on cooler days, since they fill up your house with cinnamon goodness with a hint of apple & pumpkin.   Good old fall smells, gotta love it.  You can’t have fall recipes without apples & pumpkin.
20151005_201116
These were made  after our girl scout meeting.  I was tired  so having an easy treat was great.  If you don’t know by now, I’m an easy gal who likes simple rustic recipes, which is what most of my recipes are.  No 20 ingredient recipe that takes hours to make.  Simpler the better for this lady.

Easy Apple-Pumpkin Mini Cinnamon Rolls
20151005_200908

Ingredients:
*1 pkg. crescent roll
*1/2 apple diced
*1/2 can of pumpkin
*1 tsp cinnamon
*sugar (just a sprinkle)

Directions:
*Preheat oven to 350.
*Roll out crescent roll sheet, keep the rolls attached making it one big sheet instead of individual crescents.  Make sure once you open the entire sheet you connect the dots so nothing leaks out.  This will take a few mins to do.
*Spread out the pumpkin in a an even layer across entire sheet.
*Spread out the apples all the way down the sheet but don’t over stuff them.
*Sprinkle with cinnamon & sugar (if desired)
*Roll up the sheet, into 1 big roll.
*Cut rolls whatever size you desire.
*Place on cookie sheet and cook 10-12 mins.
*Take out & let cool for 15 mins.  Then they are ready to eat.
~Enjoy~

Do you have a favorite cinnamon roll flavor?  What other variations would you make?

10 Fun Camping Food Ideas

In lieu of our upcoming camping trip, I thought it would be fun to do a round-up of some fun camping food I found while searching for budget friendly ideas.  Just click on the images to get to the recipe.  **Side note-The images are not mine, they are from the recipe sites.**   ~Enjoy~
Fruit Salad W/ Honey-Lime Dressing

Grilled Bananas W/ Coconut Caramel Sauce

Chocolate-Covered Watermelon Bites
Chocolate-Covered Watermelon Bites Recipe
Campfire Eclairs
Campfire Eclairs will be a new tradition. A campfire treat that tastes as pretty as it looks. So clever and easy!
French Toast Roll-Ups
French Toast Roll-Ups - cream cheese, fruit, or whatever fillings you like rolled up in cinnamon sugar bread. the-girl-who-ate-everything.com
Pineapple & Ham Skewers
Ham and Pineapple Kabobs
Grilled Pineapple

Dark Chocolate Covered Pineapple
dipped pineapple_1
Mini Bun-less Cheeseburger Bites

Mexican Corn On The Cob
Mexican Corn on the Cob - This is the best way to serve corn, brushed with melted butter and sprinkled with chili powder, cheese and lime!
What’s some of your favorite camping foods?  Got any good recipes to share?

5 Ingredient Protein Squares

untitled (1 of 1)-8
As many of you know, from following my blog, I am all about keeping things as simple.   I’m all about making delicious healthy simple foods for your family.   You won’t ever see any complicated recipes that you need a degree to make.  Nope, around these parts, the simpler the better.  With that being said, today’s recipe is an extension of my fabulous 3-ingredient granola bar.  If you haven’t already checked it out, click on the link to check it out.
These delicious squares are chock full of protein from the peanut butter, chia seeds, & the whey protein.

5 Ingredient Protein Squares
untitled (1 of 1)-3

Ingredients:

  • 4c oatmeal
  • 1/2 to 3/4 local honey 
  • 1 3/4 to 2c peanut butter
  • 1 scoop protein powder ( I used
  • 1-2 TBSP chia seeds

Directions:

  • Measure & place oats, protein powder, & chia seeds in desired bowl
  • In a microwave dish or saucepan add honey & peanut butter together
  • Microwave for about 45 seconds to 1 minute depending on your microwave.  Using the stove, cook on med till melted together completely, which should only take a few minutes.
  • Once peanut butter and honey are melted stir together till fully incorporated.  I was worried when it 1st came out of the microwave since it seemed a little separated.  But once I stirred it together, it was perfectly fine.
  • Dump peanut butter mixture in to the oat bowl and stir together till fully mixed.  Make sure all the oats are fully covered in the the mixture.
  • Use whatever desired pan you want and push all the oats down on the pan.  I wanted to use a 9×9 but I didn’t have it so I used a 9×13 and used half of the pan.
  • Refrigerate for about an hr.
  • Take out, cut into bars, & enjoy.  I left my bars in the fridge keeping their form and the kids took them out as desired.

    sharing with:
    Oh My Heartsie Girl, Create With Joy, The Jenny Revolution, Homestead McCoy, Skip To My Lou


3-Ingredient No Bake PB Oat Bars

untitled (1 of 1)-2
Feeding a large family on a small budget takes some ingenuity.  Snacks & summertime makes this especially challenging since all the kids are at home full time & nothing lasts more than 10 minutes.  It’s frustrating taking the time to bake yummy treats and watch the kiddos rip through them in the matter of minutes.
I’ve done a lot of thinking and did a food overhaul replacing the snacks with more frugal, tasty & healthier snacks that take little to no time to make.  I’ve made numerous snacks that the kids have just loved.   I’m ready to add another delicious recipe to my ever growing arsenal.  The biggest problem I have now, is picking which one to make.
I didn’t have much to bake with, since I have gone grocery shopping yet since we got back.  I’m trying to stretch out the little we have in the pantry before going to the store.  As I looked around I noticed I had oats, honey, & peanut butter. Viola my granola bars are born.  Little did I know there were numerous sites that have already done this, nothing is original……..Thank you Pinterest.  Anyways, I plan on using this recipe as a base to create different flavorful combos with.

3-Ingredient No Bake Peanut Butter Oatmeal Bars
These granola bars are the simplest, easiest, cheapest granola bars you can make, that take only a few minutes to put together.  Once mixed thoroughly, pop them into the fridge for as long as you desire.  And enjoy.
untitled (1 of 1)-4

Ingredients:

  • 4c oatmeal
  • 1/2 local honey 
  • 1.5c peanut butter

Directions

  • Measure oats and place in desired bowl
  • In a microwave dish or saucepan add honey & peanut butter together
  • Microwave for about 45 seconds to 1 minute depending on your microwave.  Using the stove, cook on med till melted together completely, which should only take a few minutes.
  • Once peanut butter and honey are melted stir together till fully incorporated.  I was worried when it 1st came out of the microwave since it seemed a little separated.  But once I stirred it together, it was perfectly fine.
  • Dump peanut butter mixture in to the oat bowl and stir together till fully mixed.  Make sure all the oats are fully covered in the the mixture.
  • Use whatever desired pan you want and push all the oats down on the pan.  I wanted to use a 9×9 but I didn’t have it so I used a 9×13 and used half of the pan.
  • Refrigerate for about an hr.
  • Take out, cut into bars, & enjoy.  I left my bars in the fridge keeping their form and the kids took them out as desired.

**Side note- This recipe makes a lot of bars, which is works well for my large family.  Feel free to cut this recipe in half for a smaller batch.**

What your favorite granola/oat bar recipe?  What add ins would you add?


Sharing with:
Thursday Favorite ThingsReal Food ForagerA Peak Into My ParadiseLou Lou GirlsPeeled WellnessCreate With Joy, Denise Designed


It’s Beginning To Look Like A Garden

_RYA0413

Growing up, I never had a garden or a house that had one.  I moved around so much, the last thing on anyone’s mind was gardening.  It wasn’t until till I was 32, when I got my 1st garden and that is only because it came with our home. One of the many perks was a few established gardens throughout my yard.  The time and effort the previous owners put in showed through the amazing soil I have.  Even though I had this great garden, I didn’t fully appreciate it till this year.
_RYA0417
This year, I am fully committed to getting as much use out of it as I can.  Not sure if it’s because I’m feeling better with my illness or if it’s because I’m older more mature, or because I realized if done correctly having a garden can save us a lot of money.  And everyone knows just how frugal I am.  Whatever the reason, I’ve been busy learning about gardening and putting what I’ve learned to good use.  Did you realize how much information there is regarding gardening?  I could learn 1 new thing a day and 50 years from now, still be learning new things.  It’s nuts all the information and all the different types of gardens or gardening techniques out there.  I thought it would be fun to share my garden, it’s progress, & helpful information I learned this year and do a few posts throughout the summer to see my progress & share any helpful tips or ideas I come across.
_RYA0415 _RYA0421
When we bought our house 3 years ago, the gardens it had was amazing.  I loved looking at the flowers and fantasized about growing the biggest and most colorful gardens.  One thing that wasn’t in my fantasy was the amount of work it entails to keep & maintain a garden.  I give all you gardeners credit, it’s a lot of work.  But I’ve been doing it slowly, over the course of the last month or so and I am starting to see results.  Isn’t it the best when you see the fruits of your labor?  But before we get to the images, I thought I would give you a quick breakdown of what I have to work with.

Here’s a break down of my yard & my goals:
*My land size is .68 acres of land (not a whole lot but enough for us….for now)
*I have 3 gardens so far: front, side, & back
*My ultimate gardening goal is to have a edible diverse landscape that utilizes my yard to the best of my ability.  I want to produce as much as possible throughout the year, increasing a little each year
*I plan on donating a good portion of my produce to the local homeless shelter and/or local veteran & seniors as much as I can throughout the garden season

Here are some more images from my growing gardening:
*this past week I was able to move my cucumber & watermelon plants into the garden, which was fun with the girls helping me out*

_RYA0430  _RYA0433_RYA0425_RYA0434_RYA0426 _RYA0435 _RYA0436 _RYA0442 _RYA0447 _RYA0448 _RYA0450

My goals for June are:
*Get free plants to plant in my garden, whenever possible (so far I’ve gotten 20ish different free plants for my garden….tomatoes, basil, thyme, tomatillos, 3 kind of squash, 2 kinds of cabbage, & 2 kinds of lettuce)
*Hollow out a few stumps in the back yard & dig up the flowers in whiskey barrel.  Plant them in the stumps
*Dig up the rhubarb & plant it in my side garden next to the grapes or next the the hostas
*Finish weed whacking the hill out back & buy some Jeeper Creeper flowers to plant around huge stump
*Pull weeds in the front where the hostas are, relocate hostas, & plant the remaining plants starting my 2nd veggie garden.  Thank goodness for having a compost ready with amazing soil.  Once plants are planted, I will be using the remaining mulch for it.
*Start weeding the front flower garden
*Buy mulch for the front flower garden & lay it down
_RYA0422

How’s your garden coming along?
I would love to see your garden images and/or read any helpful information posts that you wrote.  Feel free to link up your gardening posts with me.
As always, I love comments so please feel free to leave me some comment love.


Sharing with:
Oregon Cottage, Create With Joy,

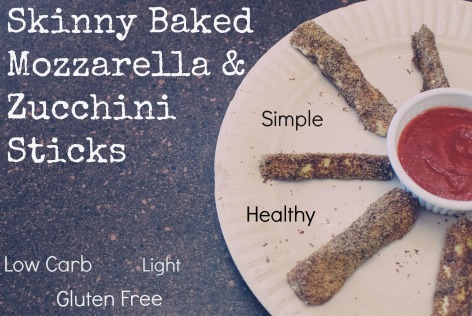
Skinny Baked Mozzarella & Zucchini Sticks

_RYA0323
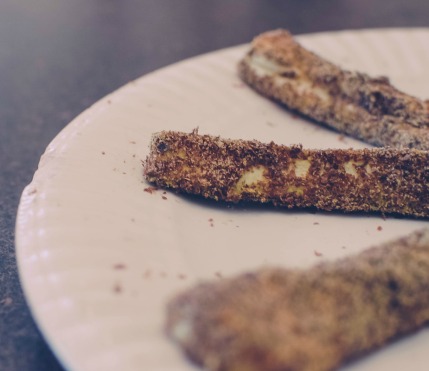
After the last couple days of rain & cold, I’m ready to get outdoors and soak in the sun.  Because I plan on being outdoors more than indoors, my lunch needs to be simple, light, quick, & low carb, since I’m limiting my carb intake again.  The perfect thing to make today would be my healthy (a.k.a. skinny) baked mozzarella & zucchini sticks.
These are great as an side dish, snack, or light lunch.  Kids and adults alike, love these at my house.  FYI-If your having this as your lunch, make sure to include something with protein.  For me, I drink a protein shake with my meal.  We all know how important protein is to our body and getting the proper amount is vital to our health & well being.
_RYA0291
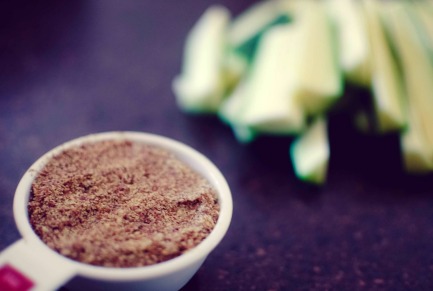
This recipe is different because I cut out the breadcrumbs and replaced it with flaxseed meal.  Have you heard of it before?  For those that haven’t it is quite a handy multi purpose ingredient that is used as a low carb alternative to bread.  Depending where you live, depends on who carries it.  But most grocery stores & a few discounts store do.  For me, our local Job Lots, MB, or Shaw’s carries it.  You can purchase an 16oz. bag for roughly $2.99, which isn’t bad since it’ll last you awhile.  Enough talking, now unto the recipe.

Skinny Baked Mozzarella & Zucchini Sticks
_RYA0317

Ingredients:
*2 small zucchini
*10 string cheese
*1/3c flaxseed meal
*2-3 egg whites
1-2 TBSP parm cheese
1/2 tsp onion powder
1/2 tsp garlic powder
1/4 tsp pepper
pinch of salt
spray oil (grease pan)

Directions:
*Preheat oven to 350.
*Cut zucchini into sticks size, as thick or thin as you desire.
*In a bowl combine all dry ingredients & mix well.  Set aside.
*In a smaller bowl, place egg whites in it.
*Dip the sticks into the egg whites 1st, then dip them in the dry mixture to coat.  Continuing on till your last stick is done. Tip-If your hands are getting too messy, use a fork instead. 
*Place the sticks on a greased cookie sheet & bake for 15 mins.
*While cooling, if you’re having a shake make one.
~Enjoy~


Sharing with:
The Lady Prefers To SaveThe LogbookA Life In The BalanceCreate With JoyNancy On The Homefront, Ramblings Of A Bad Domestic Goddess,


5 Simple But Delicious Ways To Cook Chicken

How do you cook chicken?

@ La Fuji Mama

Around my parts, chicken has been on sales each week for about a month now.  So we’ve been eating a huge amount of it.  I’ve been saving a lot of money but I’ve also gotten tired of cooking it the same way.  It’s become stale and boring for us, well me and the kids.  Hubby could eat the same thing every day for the rest of his life and he would be perfectly fine with it.  Men 😉

I’ve been experimenting with it and here’s a few things I found that work great & adds an extra umph to our chicken:

  • throwing my trusty green salsa over it in a crockpot, with a half of lemon squeezed over it & throwing the lemon on top
  • use vinegar with some spices, makes it super moist.  And it doesn’t leave a vinegar taste one might think
  • combine 2-3 different citrus juices with a few of your favorite herbs
  • add coconut butter in the cavity and/or under the skin (reg butter works too)
  • for chicken tenders use flaxseed meal instead of breadcrumbs to make it healthier

Got an secrets ingredients or recipes that you use to make the most delicious chicken around?  Please share with us all, it would be very appreciated.  


Sharing With:
Ramblings Of A Bad Domestic GoddessA Life In BalanceCreate With Joy


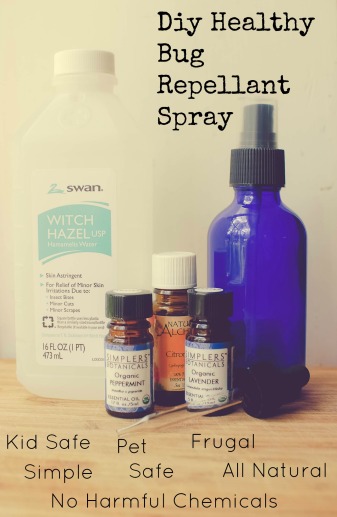
Diy Healthy Bug Repellant Spray

diy bug-1
Whether you’re camping or live in the county, this time of year the bugs are just awful.  Tomorrow, I will be at one of my favorite spots (Sebago Lake Maine), soaking in the sun, dipping my toes in the sand, & battling the swarms of black flies.  Last year, my little ones got eaten alive, since nothing seemed to work for them.  This year, I am determined to not offer up my little ones as live bait for them.  I’ve done quite a bit of research on this matter and have come up a simple, quick, & easy bug spray  that isn’t harmful to my girls, which seems to be working well at home.  So, I’m sure this will be a great comfort to my in combating all those pesky black flies this weekend.

DIY All Natural Bug Spray

Ingredients:
2 parts distilled water
1 part witch hazel
25 drops Lavender essential oil
25 drops Peppermint essential oil
18 drops Citronella essential oil
4 oz. spray bottle

Directions:
1. Fill spray bottle with the proper amount of water
2. Add the witch hazel to the water.  Since essential oils don’t mix well with water, you need something to act as an emulsifier, if you don’t have witch hazel on hand, try fractionated coconut oil, which I’ve read works just as well.
3. Add in each essential oil.  The amount you use depends on your desired scent.    Feel free to add as little or as much as you deem fit.
4. Shake before every use.

Here’s some additional recipes/ideas to check out:
Natural Insect Repellent
I loved this one because it was one of the only ones I found that didn’t use essential oils, just a few common ingredient everyone can acquire easily.

DIY All-Natural Bug Repellent
I thought this recipe was neat because it called for Epsom salt, which isn’t something I saw in a lot of other recipes.

DIY Citronella Candles
I loved this for the ease and look.  It would be great to have camping, just throwing together a few ingredients and viola, you have added protection.

How do you combat the awful bug season?  Any recipes or ideas to share?


Sharing with:
Create With JoyLou Lou Girls,

28 Ways To Eat Dandelions W/ Recipes

Dande
The other day I noticed how many dandelions were popping up in our yard.  For some reason, this caught my eye and I began to remember how much I loved them as a kid.  I used to make numerous crowns for myself and my dolls, make thousands of wishes, & I even ate them before I knew they were safe to eat.  I loved eating them, so started the gears in my head to spin, & I decided this year I need to use the free bounty that was given to us, the best way I can.  There were two ways that came to mind: using them in our meals & beauty care products.  Today’s post is all I am showing you different ways you can incorporate into your meals, with links to the recipes.
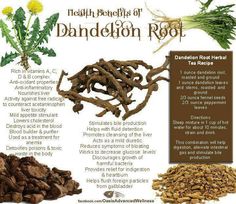
But before I share delicious recipes, I thought I would include some helpful information about the benefits of dandelions.  I’ve included three helpful infographics I found on Pinterest to show you all the benefits of using the whole dandelion (root, leaves, & flower part).

dandelion-benefits-infographic
84316e176a02c7274d00195b6a1401cf
73d32549c8ae4d2a6abba2b0f23b8508

Now, lets talk about the different ways you can use these bright colored flowers in your meals.  I’ve researched and researched and come up with 28 different ways you can eat them.  Just click on the idea and it will bring you to a site that offers a recipe that’s worth trying.  So, here we go……..

Juice
Cakes & Cupcakes
Breads
Soup
Side dishes
Pancakes
Wine
Fried
Jelly
Muffins
Chips
Tea & Chai tea
Coffee
Pesto
Syrup
Butter
Frittata
Macarons
Bread pudding
Cookies
Ravioli
Veggie burgers
Pizza
Salad
Tincture
Vinegar
Sausages
Stew
What are your favorite ways to eat dandelions?  If you haven’t before, what recipe appeals to you the most?


Sharing with:
Create With JoyOur Simple Homestead,Lou Lou Girls