Moro de Habichuela (Dominican Rice n Beans)

untitled (1 of 1)-4
When I was younger, I stayed in an all Spanish community, where I was the only non-Spanish person around.  The lessons I learned from this experience was life changing.  The pieces of their culture that I fell in love with I took and incorporated it into my family’s daily life like their music, dancing, & food.  Plus it helps my two older ones (who are half Dominican) to connect with a part of their heritage.
True Dominican food is absolutely amazing.  If you haven’t tried it, you are really missing out.  The food is not only delicious but very frugal to make.  The 1st dish I’m sharing with you is a staple food that you can make many different ways depending on which beans you use.  It’s a simple delicious filling meal that feeds a crowd.

Moro de Habichuela 
adapted & taken from: Aunt Clara’s recipe
_RYA0235

Ingredients:

  • 4 cups white rice
  • 1 can 15.5 oz kidney beans (or any cooked beans of your choice)
  • 6 cups water
  • 5 tablespoons olive oil divided
  • 2 TBSP tomato paste
  • 1/4c chopped peppers ( i used sweet mini ones)
  • 1 pinch of Oregano
  • 1-2 tsp garlic minced
  • 3 fresh thyme leaves
  • 1-2 tsp chopped Cilantro
  • salt

Directions:

  1. Heat half the oil (2.5 Tbsp) in an iron pot over low heat and add cilantro, garlic, thyme, celery, olives, oregano, cubanela, capers. Cook and stir for a minute, or until the ingredients release their aroma. Stir in the tomato paste.
  2. Add beans, also while stirring, add season with salt. Once heated through, add water and bring to the boil (try the mixture and add salt to taste before proceeding, bear in mind that the rice will absorb some of the salt, so don’t low-ball it).
  3. Stir in the rice and simmer stirring frequently to avoid excessive sticking. Make sure to remove the rice that sticks to the bottom.
  4. When the water has evaporated cover with a tight-fitting lid and simmer over very low heat for 15 minutes. Wait 15 minutes, uncover, add the remaining oil and stir.
  5. Cover again another 5 minutes. After this the rice should be firm but tender inside. If necessary, cover and leave another 5 minutes over very low heat (if at this point it looks too dry add ¼ cup of boiling water before stirring and covering.

~Enjoy~

Are you a fan of Dominican food?  What’s your favorite dish?


Sharing With:
Strangers & Pilgrims on Earth,


13 Ways To Embrace Winter By Keeping It Simple

I’ve never really been a winter person even if I’ve lived in New England a good portion of my life.  Each year, I never look forwards to winter, the cold weather, & all that it brings.  But this year, I was determined to make the most out of winter, embracing everything it has to offer instead of being depressed, stuck indoors, waiting for the spring to arrive.  I know I’m not alone, there are others who don’t enjoy winter.  So here’s some of the things that have made this winter actually quite enjoyable.  It may not be my most favorite season, but it definitely not a time to dread anymore.  Here’s a few ways I’ve embraced winter.
24

1. Get the right gear
“There is no bad weather, only bad clothing.” ~Swedish Saying
Having the right gear is EVERYTHING.  How can you enjoy the colder months is your freezing?  You don’t need to spend a fortune, just make sure you have good gloves, hat, neck wrap, & warm boots.  Oh and wearing two pairs of pants on really cold days helps a lot.

2. Change your mindset  

Attitude is everything.  Start finding little ways you enjoy about winter and go from there.

3. Admire the beauty of the season
Have you been out looking around, it’s quite beautiful out.  The snow & ice offers such fantastic props for images.  Next time your out, start really looking around, seeing all the beauty that’s around you.

4. Make your home cozy & enjoy the comforts
Fires, candles, essential oil diffusers etc. helps make you house cozy.  Who wouldn’t want to be home if it’s nice & cozy.  Enjoy the comforts of food, warm drinks, reading, snuggling etc.

5. Have a winter bonfire
Who doesn’t love a good bonfire?  Bonfires aren’t just for spring & summer, winter ones can be just as fun.

7. Snuggle up with a good book
Got some reading to catch up on, now is the perfect time.  Make yourself a nice warm drink, snuggle with your favorite blanket and get your reading on.

8. Have a game night
We love game nights at our house.  Wintertime is a great time to have these more often, as we are always looking of ways to have fun with all 5 kiddos, but it’s hard since the ages they are 16-6.  Games is a perfect way for us all to have family time.

9. Exercise @ least 1x per day
No, you don’t need to go crazy or anything, just get out and walk.  I love walking now, so that’s what I will do till spring, then I’m hoping to fix my bike and start biking again.  My stomach can’t handle running, so I don’t ever think I would do that.  Just do whatever you can at least 1x per day.

10. Get outdoors as often as you can……..staying indoors is depressing
Getting out in the fresh air will do you wonders.  Stop barricading yourself in, get out, & embrace the cold.

11. Activities & hobbies ie. snowshoeing, sledding, crafts etc.
Finding something to get up moving, is always great.  Why not make it something fun.  Take up new activities or do something you already love.  It’ll make winter so much more enjoyable.

12. Eat as healthy as possible
The way we eat will affect the way we feel.  Fill your body with foods that it will thank you later for.

13. Host an outdoor party or pot luck
Parties of any kind are fun.  Why not host one at your house?  It can be as simple as you want, just gather a few people together to enjoy each other’s company.

Are you a fan of winter?


Sharing with:
Katherine’s Corner, Create With Joy,  A Life In Balance

8 Frugal Ways I Saved Money This Week

I’m always on the lookout for ways to save or stretch our money as much as possible.  I’m very good at it, but there is always room to grow.   Part of my growing, is sharing with others how I do this, especially doing it with a large family.  I decided that each week I will share the frugalness through successful shopping trips, tips, ideas etc.  I hope others out there, share their frugalness with me as well.  So we can learn from one another as well as learning successful ways to be frugal.
During the holidays, it’s easy to be frugal, if you can squash the wants & so called needs.  There are so many things I would love to buy, some even I think I need to buy but reality is, is that I don’t.  To help me keep my perspective, I usually do something special with the family through free or cheap activities, crafts, diy, or outings.  This week’s biggest money savings came from a raffle basket I won.  See below how I saved money this week.
images

1. Got 5.5lbs of spicy sausage for $5.00 total @ Shaw’s.
2. My husband donated one of the games & a movie I won to Toys for Tots.
3. Used 2 movies from the raffle basket I won for a birthday present my girls will give their classmate.
4. Returned 2 games I won that we couldn’t use & exchanged it for Christmas decorations
5. Attended a family cookie decorating party and brought free cookies home.
6. Since work ended for the season, I’m saving a lot of money on gas.
7. Recycled things around the house for supplies for ornament gift toppers.
8. Had a few extra pieces of garland and tied it into my girls hair instead of throwing it away.  Instant festive hair.
Bonus: My mother in law made us some yummy cookies.  Yay for cookies!! 

How did you save money this week?  Got any frugal tips or ideas to share?  Or a frugal score you just have to share.  Love to hear them all 🙂 


Sharing with:
Create with Joy, Oh My Heartsie Girl, Simply Wright,


DIY Ornaments: Wood Sled & Borax Snowflake

For the last few years, my town does this neat event called “Festival of Trees” where different organizations decorate a tree according to their specific theme, that is scattered through our armory (which is also our community center.)  This year not only is the elementary school decorating one but our girl scout troop is too.  Our girl scout troop is doing snow sport theme, which isn’t the easiest them to work with, let me tell you.
Our girl scout troop is divided into Daisys and Brownies, so we are doing two different kinds of ornaments……..wooden sleds for the Daisys & borax snowflakes for the brownies.  Both ornaments were fun to make, simple enough to the kids to do, & cheap to make.
PicMonkey Collage
The snowflakes were fun to watch crystalize over a period of 12 hrs.  The girls kept coming back to check every so often.  The sleds were also fun to make since the girls got to use hot glue.   They also enjoyed customizing them, since they could color them any way they wanted.
PicMonkey Collage 2

Borax Snowflake
Supplies:
3 tablespoons of borax
boiling water (enough to submerge the snowflake)
2 pipe cleaners (whatever color you want the snowflake to be)
a pencil
container (fits the snowflake comfortably)
fishing line
Directions:
* Take one pipe cleaner and cut it into three equal parts.
*Take the other pipe cleaner and cut it into 6 equal parts.
*Take the 3 longer pieces & twist together forming a star shape.
*Take the smaller pieces and twist around the end of each star, turning it into a snowflake.
*Boil enough water to submerge the entire snowflake.  Once boiling, pour into container that fits the snowflake comfortably.
*Pour borax into container and stir well.  This part is very important, you need to mix well, making sure there isn’t any borax on the bottom or it won’t work.
*Take snowflake and tie fishing line around it.
*Place snowflake into the borax solution and have it hang from the pencil.
*It takes anywhere between 4-12 hrs.  I let it set for 12-13 hrs.
*Once set, take snowflake out of solution and let dry for a few minutes.
~Viola you have just made a borax sparkly snowflake. ~

Popsicle Sleds
Supplies:
hot glue
8 popsicle sticks per sled
markers or paint

Directions:
*Take 5 sticks and place them together, in the desired sled shape you wanted.
*Cut one stick into pieces, that aren’t bigger than the sled, so it doesn’t show from the other side.
*Glue 2 cut pieces over the sled shape, holding it together.
*Make 2 glue dots on each cut piece.
*Place 1 stick per side for the legs of the sled.  Make sure to add extra glue for support.
*Once dried, decorate as desired or leave blank.
~Viola, you just create simple sleds in under 5 minutes.~

What ornaments have you made this holiday season?  I would love to see them 🙂


Sharing:
Ducks N a Row, Create With Joy,

Would You Buy Used Items For Christmas Gifts?

Question of the day:  
“Would You Buy Used Items For Christmas Gifts?”  Why or Why not.

Tomorrow, I get to spend two hours alone shopping in my favorite city.  Since I don’t get out there much, I’m super excited. I get to hit all the stores I that I love….Christmas Tree Shop, Goodwill, & Savers. As I’m writing my Christmas list out, I began wondering, am I a weirdo because I would gift used items?
Each year, I have certain people in mind that I shop for year around and if something strikes my eye, I will buy it, used or not. I see nothing wrong with buying people used items because
it saves me money
recycles, keeping one less item of our landfills
&
it’s new to them.
Don’t get me wrong, the items I buy aren’t junk, they are well thought out gifts, that I truly feel that recipient would enjoy. Just because something is used doesn’t mean it’s trashy junk. I know there are lots of others out there, who think I’m weird. But hey that’s ok.  I would find it an honor to be known as the weird frugal lady 😉
What do you think?  Do you do it or are you against it?


Sharing with:
Create With Joy,  A Fresh Start On A Budget, Ducks N a Row

What Helps Keep Your Perspective During The Holidays?

The holidays are an easy time to get swept up, lose perspective, and spend a lot of money.  Thankfully, each holiday season, our budget isn’t big, which helps keeps my perspective on things.  Before I embraced simplifying,  I would spend money I didn’t have to buy things we didn’t need.  I was always broker than broke for months to come.  Growing up I didn’t have a lot so I always wanted my kids to have more, but along the way I lost perspective and went way overboard.  I no longer wanted to be one of those people who spent thousands during the holiday season.  Thankfully, my husband was the one who got me into budgeting and I couldn’t be happier.
Because of budgeting, I’m not able to go all out, buy a ton of unnecessary things that no one will use, instead I plan everything out, knowing how much I have to spend on each person.  I like to match up my gifts to each person’s likes to the best of my ability.  For example this year I’m making my 2 older nieces marshmallow shooters with their favorite color duct tape as decoration.  This is a frugal but loving gift that I know will bring lots of happiness and laughter.  There is something you can do for everyone.  Grandparents love photos, make something out of your favorite photo.  Last year I took a dollar store tin and pasted a pic in it, & put it in the baskets I give our parents.  Simple, easy, but loving.
587150
I’ve been on a journey this past year of simplifying all aspects of my life, since a lot wasn’t working for me.  This is an on going journey, one that has many pit-stops, detours, & obstacles to overcome.  But so far, I’ve been doing great, slowly simplifying what I need & want in my life, & getting rid of the rest….the unnecessary clutter.
The holidays is such an easy time to fall back into bad habits, that is why you need something to keep you in check.  Budgeting has become this tool for me.  What will help you?  Finding something that helps keep us grounded, helping to keep our perspective will enable us to have the things and people we want in our lives, that bring the most joy & happiness.  It’ll free up time & energy for those important parts of our lives.  Who couldn’t use more joy, happiness, & energy during the holiday season?

I would love to hear your thoughts on this.  Send some comment love my way………...


Sharing with:
Strangers & Pilgrims on Earth,  Ask Latisha, Create With Joy,

Roasted Broccoli, Potato, & Cheese Soup

soup 1
Last week, I was looking for a new soup recipe that everyone would enjoy.  Normally, my youngest son, doesn’t eat dinner with us when I make chicken soup, so I was determined to find a recipe that all 7 of us loved as well as one that was cheap to make.  After numerous days of looking at numerous recipes, I can across a recipe that I tweaked and it has turned into our favorite soup recipe.  The kids have asked for it every other day, so I plan on making this soup at least once a week since it’s cheap to make, makes a lot,  & simply delicious.
Feel free to tweak the ingredients to your family’s tastes.  Just be sure to not add to much cheese, so you don’t get any clumping in the soup, it doesn’t look so great.  But still taste the same.  😉

Roasted Broccoli, Potato, & Cheese Soup
20151025_133200
**adapted from The Wicked Noodle**
total cost $18.85 with 20 servings $.94/serving

Ingredients:

  • 3-4 tablespoons olive oil, divided
  • 1lbs. frozen broccoli or 3 heads fresh broccoli, cut
  • 1 medium sweet onion, chopped
  • 1 large  potatoes, diced
  • 2 32oz. carton chicken broth
  • 1 12oz. evaporated milk (any milk should work)
  • .5-1 cup shredded sharp cheddar cheese
  • salt, ground pepper, & crushed red pepper to taste

Directions:

  1. Preheat oven to 400F.
  2. Drizzle broccoli florets with 2 tablespoons olive oil, season with  salt.  Roast for 20-30 minutes. Set aside.
  3. Meanwhile, heat remaining olive oil in a large soup pot. Add onions and saute until soft and translucent.  Add potatoes and chicken broth.  Simmer until potato is soft, about 15-20 minutes (depending on size of your potato pieces).
  4. Add milk and broccoli.  For the broccoli, I blended 3/4 & left  the rest whole for different textures.  FYI- if you want thicker soup, blend all the broccoli and mix it into the soup.  Heat mixture just until very hot (do not boil). Stir in cheese until melted and fully incorporated. Season to taste with salt, pepper, & crushed red pepper.

Serve with warm homemade bread & enjoy!!

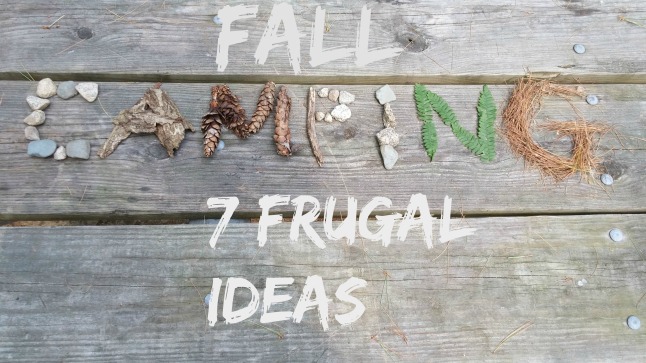
Fall Camping: 7 Frugal Ideas To Get You Started

Ever go camping in the fall?  If you not, you are surely missing out.  Cooler nights….hot cocoa by campfire….crockpot meals….trick or treating….snuggling around the fire….kayaking during foliage season….sharing stories, drinks, & good food….What could more exciting than fall camping!?!?
This week, I’m getting ready for our last weekend of camping for this year.  The weekend isn’t supposed to be a great one, lots of rain, but that won’t deter us from having a grand ol’ time.
20150805_145631 (1)
Since it’s our last trip of the year, I’ve got a few things I wanted to do, but of course I want to keep it low key, not spending much.  Here are 7 Frugal Ideas to help get you started:
*Plan delicious but easy seasonal comfort dinners such as casseroles, chili, or crock pot meals.  Here are a few suggestions:
~Potato, Corn, & Sausage Bake
~Salsa Verde Chicken for Tacos
~Nachos
~Sweet Potato Chili
*Figure out a few fun games to play ahead of time (the more you incorporate nature the easier it will be.)  Our favorites are:
~glow in the dark tag or hide n seek
~plan a scavenger hunt (make it as easy or difficult as you like)
~make words or sentences from the nature
~make leaf people using only what you can find
*Campground offering trick or treating here are few ideas to keep your cost down:
~use your kids dress up clothing
~buy a pack or two of Halloween makeup @ the dollar store & paint their face
~ask a friend if they have anything you could use
~search around the house & make something from what you find
*Warm desserts will hit the spot on any cool night.  Some of our favorites are:
~banana boats
~shortbread cookie s’mores
~warm apple cake
~cobbler (you can use an assortment of berries or stone fruit)
*Bring extra blankets or throws to snuggle with around the fire or for a chilly night
*Set aside some “mindful minutes” time.  This is what I call the time I use to be mindful & live in the present.  It has a catchy ring to it huh?  Here a few examples to get you started:
~explore mother nature through canoes or kayaks, hiking trails, or a walk around the campground
~take in everything around you: smells, sounds etc…
~disconnect from all electronics for as long as you can during your trip
~meditate
*Decorate inside & out of your camper or tent….making it cozy & fun
~add a few throw pillows & blankets can really liven the space up
~lighting is important: have fun lighting on the outside & practical lighting on the inside
~get kids involved having them come up with a few ways to give the space some life
~make it fun since fun equals cozy….the kids will love it
BONUS:
*Embrace the weather & have fun with it
~if it rains bring boots, extra clothing, & shoes.  Then lets the kids have fun it in running around & playing games
~windy days bring kites for some extra fun in the campground field
~cold days bring extra sweaters or jackets, thermal underwear & undergarments

****If you are interested in some of the above recipes, please let me know and I’ll make a post with the favorite recipes people are interested in. ****

Got any delicious camping recipes?  Or any great camping tips?  Please share them in the comment section below.


Sharing with:
Katherine Corner

Budget Friendly Needful Back To School Shopping

Back to school shopping isn’t very big in our house.  We don’t buy the kids new wardrobes, a bunch of school supplies, & haircuts unless needed.  This year we budgeted $100/ older kids ($300 total) & $25/ little one ($50 total) for little ones.  To some this may seem like a lot, but to others this a small budget, but for us this is just right.
Staying within our budget is a must, since there isn’t any extra money.   What helps keep me in budget is instead of buying by what the kids or I want, we buy by what we need.  It’s a simple concept but the follow through is what gets you.  It’s something that took me a long time to understand, grasp, & commit too. 77
Yesterday, I took the  girls (my 1st & 2nd grader plus my Sophomore) shopping, which ended up being lots of fun.  Our day started out by taking advantage of a favorite local business of ours celebrating their 23rd anniversary and offering a bunch of free services like eyebrow waxing.  What teen girl would pass up a free eyebrow waxing?  I took my oldest daughter and we had some mom & me time doing our eyebrows together for free.  That was a savings of $40.00 ($30 for 2 waxings plus $5 tip x2).  What an exciting way to start our day, saving money, bonding, & having a little fun together.
At Goodwill, we found some pretty good deals as well as a they special  sale going on where you get $5 off a $25 purchase.  I got two brand new backpack for cheaper than I would be able to get one everywhere else, only $7 ea.  Originally, my girls wanted character backpacks, but I explained to them how much more it would cost us for that and we wouldn’t have been able to get a new 1st day outfit for them, but left the choice up to them.  They thought about it and decided on going with the cheaper backpack because they wanted a new 1st day outfit.  So I saved $31.00.  My oldest got two nice pieces of clothing for $3 ea, one being brand new.
Next, we stopped at a consignment store that was a bust since it was super expensive.  They had backpacks for $40!  It’s insane how much money people spend for back to school stuff.  Our last stop was Target, which I did extremely well.
At Target I made a plan to only buy what we need in order for the kids have a great 1st week, which helped me get the spend less.  Before shopping, I knew what all 5 kids needed for them to start school.  I went through their clothing & supplies making sure to not buy anything that wasn’t needed.  Being organized is a big key in saving money.  I’m not very organized person overall but I am when it comes to being frugal.
In each dept, I made sure to hit up the clearance section 1st, which helped me score some great deals like 2 cute colorful matching dresses for $20 with cute sneakers for $7.00.  It’s a tradition that my girls get matching outfits for 1st day of school & holidays.  It’s more for me but while they still like doing it, I’ll continue on with our tradition.  After all our shopping, I can happily report that I was under budget by $2.77 which of course made me smile.  My frugality sure paid off.   Not only did we save a lot of money, but I got to have a fun day with the girls, sharing my frugalness with them.
Untitled
This type of shopping may not appeal to a lot of you out there, but for us it’s the only way to shop.  Why buy a new lunch box when you have a good one from last year that works and does it job?  Why buy unnecessary clothing that’ll take up space, when you already have more than enough at home?  Think about it, it’s such a waste of money buying things we already have just because it’s from last year or doesn’t look as new as it once did.  Instead save your money and put it towards something you need or something that’s important to you.  Try washing something that is a bit dirty, use heavy duty stain removers if needed.  Or try adding some new bling to your last year items, making it new again.  Or throw a few stickers of their favorite characters on something, making it fun again.  My kids have everything they needed to make the 1st day/week enjoyable, fun, & successful.  Isn’t that what back to school shopping is about?
What is the best back to school deal you scored?  Got any tips on how to keep your back to school shopping budget friendly?


Sharing with:
Create With Joy

Healthy Sweet Potato Protein Pancakes

**This post is part of my month long July challenge**
20150709_092352_resized
This morning we woke up and all wanted pancakes.  For the kids, they wanted to regular box mix kind which I added frozen strawberries to but for me I wanted a healthy alternative.  I normally make my pancakes with just sweet potato and egg, but today I decided to add some added protein to them.  The recommended protein intake is about 30mg, which I don’t always reach. So anywhere I can add some protein, I do.  I added a little coconut butter to them and my healthy breakfast was done.  These pancakes are quite simple, tasted amazing, & takes only a few minutes to make.  Who can argue with that?

Healthy Sweet Potato Protein Pancakes
20150709_093133_resized (2)

Ingredients:
*1 cooked sweet potato
*2 eggs
*1/2-1 scoop protein powder

Directions: 
*Take the flesh off of the sweet potato & put into a bowl.
*Add the protein powder and eggs.
*Mash them together till completely mixed.
*Heat a frying pan, scoop out about a fist size of the mixture, and plan in pan.
*Turn over after a few minutes.
*Flip over again till both sides are cooked.  Remember the smaller the pancake, the quicker it will cook.
*Once done, transfer to plate and add your favorite topping.  I added coconut butter but you could add peanut butter, fried egg, syrup, or whatever else you fancy.
~Enjoy~


Sharing With:
Create With Joy